Archives

Yard Bird Stew

Half of all the chicks I hatch each year are little roosters.  That means at least thirty-five young male birds have to find homes.  I only sell pullets with a rooster to make sure some males go quickly.  Everyone wants hens—roosters, not so much.  By selling trios and quartets, two or three pullets with a cockerel, I assure five or six roosters leave the farm.  Luckily there are people looking for just roosters and I usually sell ten or so that way every summer. By fall there are usually at least a dozen or more extra males hanging around.  I reserve two or three of the very best for my own flock and will keep a few more of the nicest roosters through the winter to sell at a premium in the early spring when people are looking for breeders.

Sometimes in early fall I take several of the ones that are least desirable for breeding on a one-way trip to Greaney’s Turkey Farm, the last stop for many fine eating birds.  Greaney’s takes care of the slaughtering, plucking, cleaning, butchering and cooling of the birds. After the quartered birds are vacuum bagged, I pop them in a chest with ice and bring them home for the freezer. Some people may be squeamish about eating animals they have raised from eggs.  Not me.  I know that while they lived, the roosters had the very best of lives, free ranging and enjoying happy times with their siblings.  They ate healthy foods and lived as well and naturally as modern chickens can hope.  They make very good eating for farmers.

The breed I raise, Ameraucana, is a dual purpose chicken.  This means they can be used for egg and meat production.  They have good-sized, well muscled bodies.  A cockerel slaughtered at about six months dresses out around 3.5 lbs, the perfect size to make stew.  The only problem with eating yard birds, as the chickens running around the yard are called, is that they can be a bit tough.  All that exercise really conditions their muscles.

The secret to good yard bird stew is brining.  Soaking the meat in a salt solution will tenderize it.  After the bird is slaughtered, the meat should be allowed to rest in the refrigerator for a couple days so the rigor mortis wears off.  Then the meat can be cooked or frozen.  This recipe will make a nice stew for four or five people.  Start three days ahead of the planned meal.

To make the brine, add 3/4 cup salt to three quarts of water.  Bring to a boil in a 6 qt pot.  Let the brine cool completely.  Place the quartered chicken in the cooled brine, assuring all the meat is submerged.  Cover the pot and store in the refrigerator for two days.  Then drain off the brine, rinse well and refill the pot with cold, fresh water to cover the chicken.  The fresh water will pull out the salt.  Refrigerate overnight.  In the morning drain the water, fill the pot of chicken with fresh water again and let sit in the refrigerator for the rest of the day.

About two hours before dinner time, drain off the water, rinse the chicken well, then add two quarts of water and cook the chicken until it starts to pull away from the bone.  Shut off the heat under the pot, remove the chicken from the pot, let it cool until it can be handled, pull all the meat from the bones and cut to bite size pieces.  At this time any excess fat floating on the broth in the pot can be skimmed.

Turn the heat to medium, put the cut chicken in the pot with 5 or 6 peeled, sliced carrots, 5-6 peeled medium potatoes, a cup of fresh or frozen green peas, a couple cubes of chicken bouillon, celery salt, pepper, rosemary, sage, marjoram, oregano and onion powder to taste.  Cook until veggies are just getting tender.  Remove cover and reduce heat to low, simmer for fifteen to twenty minutes to reduce the stock.

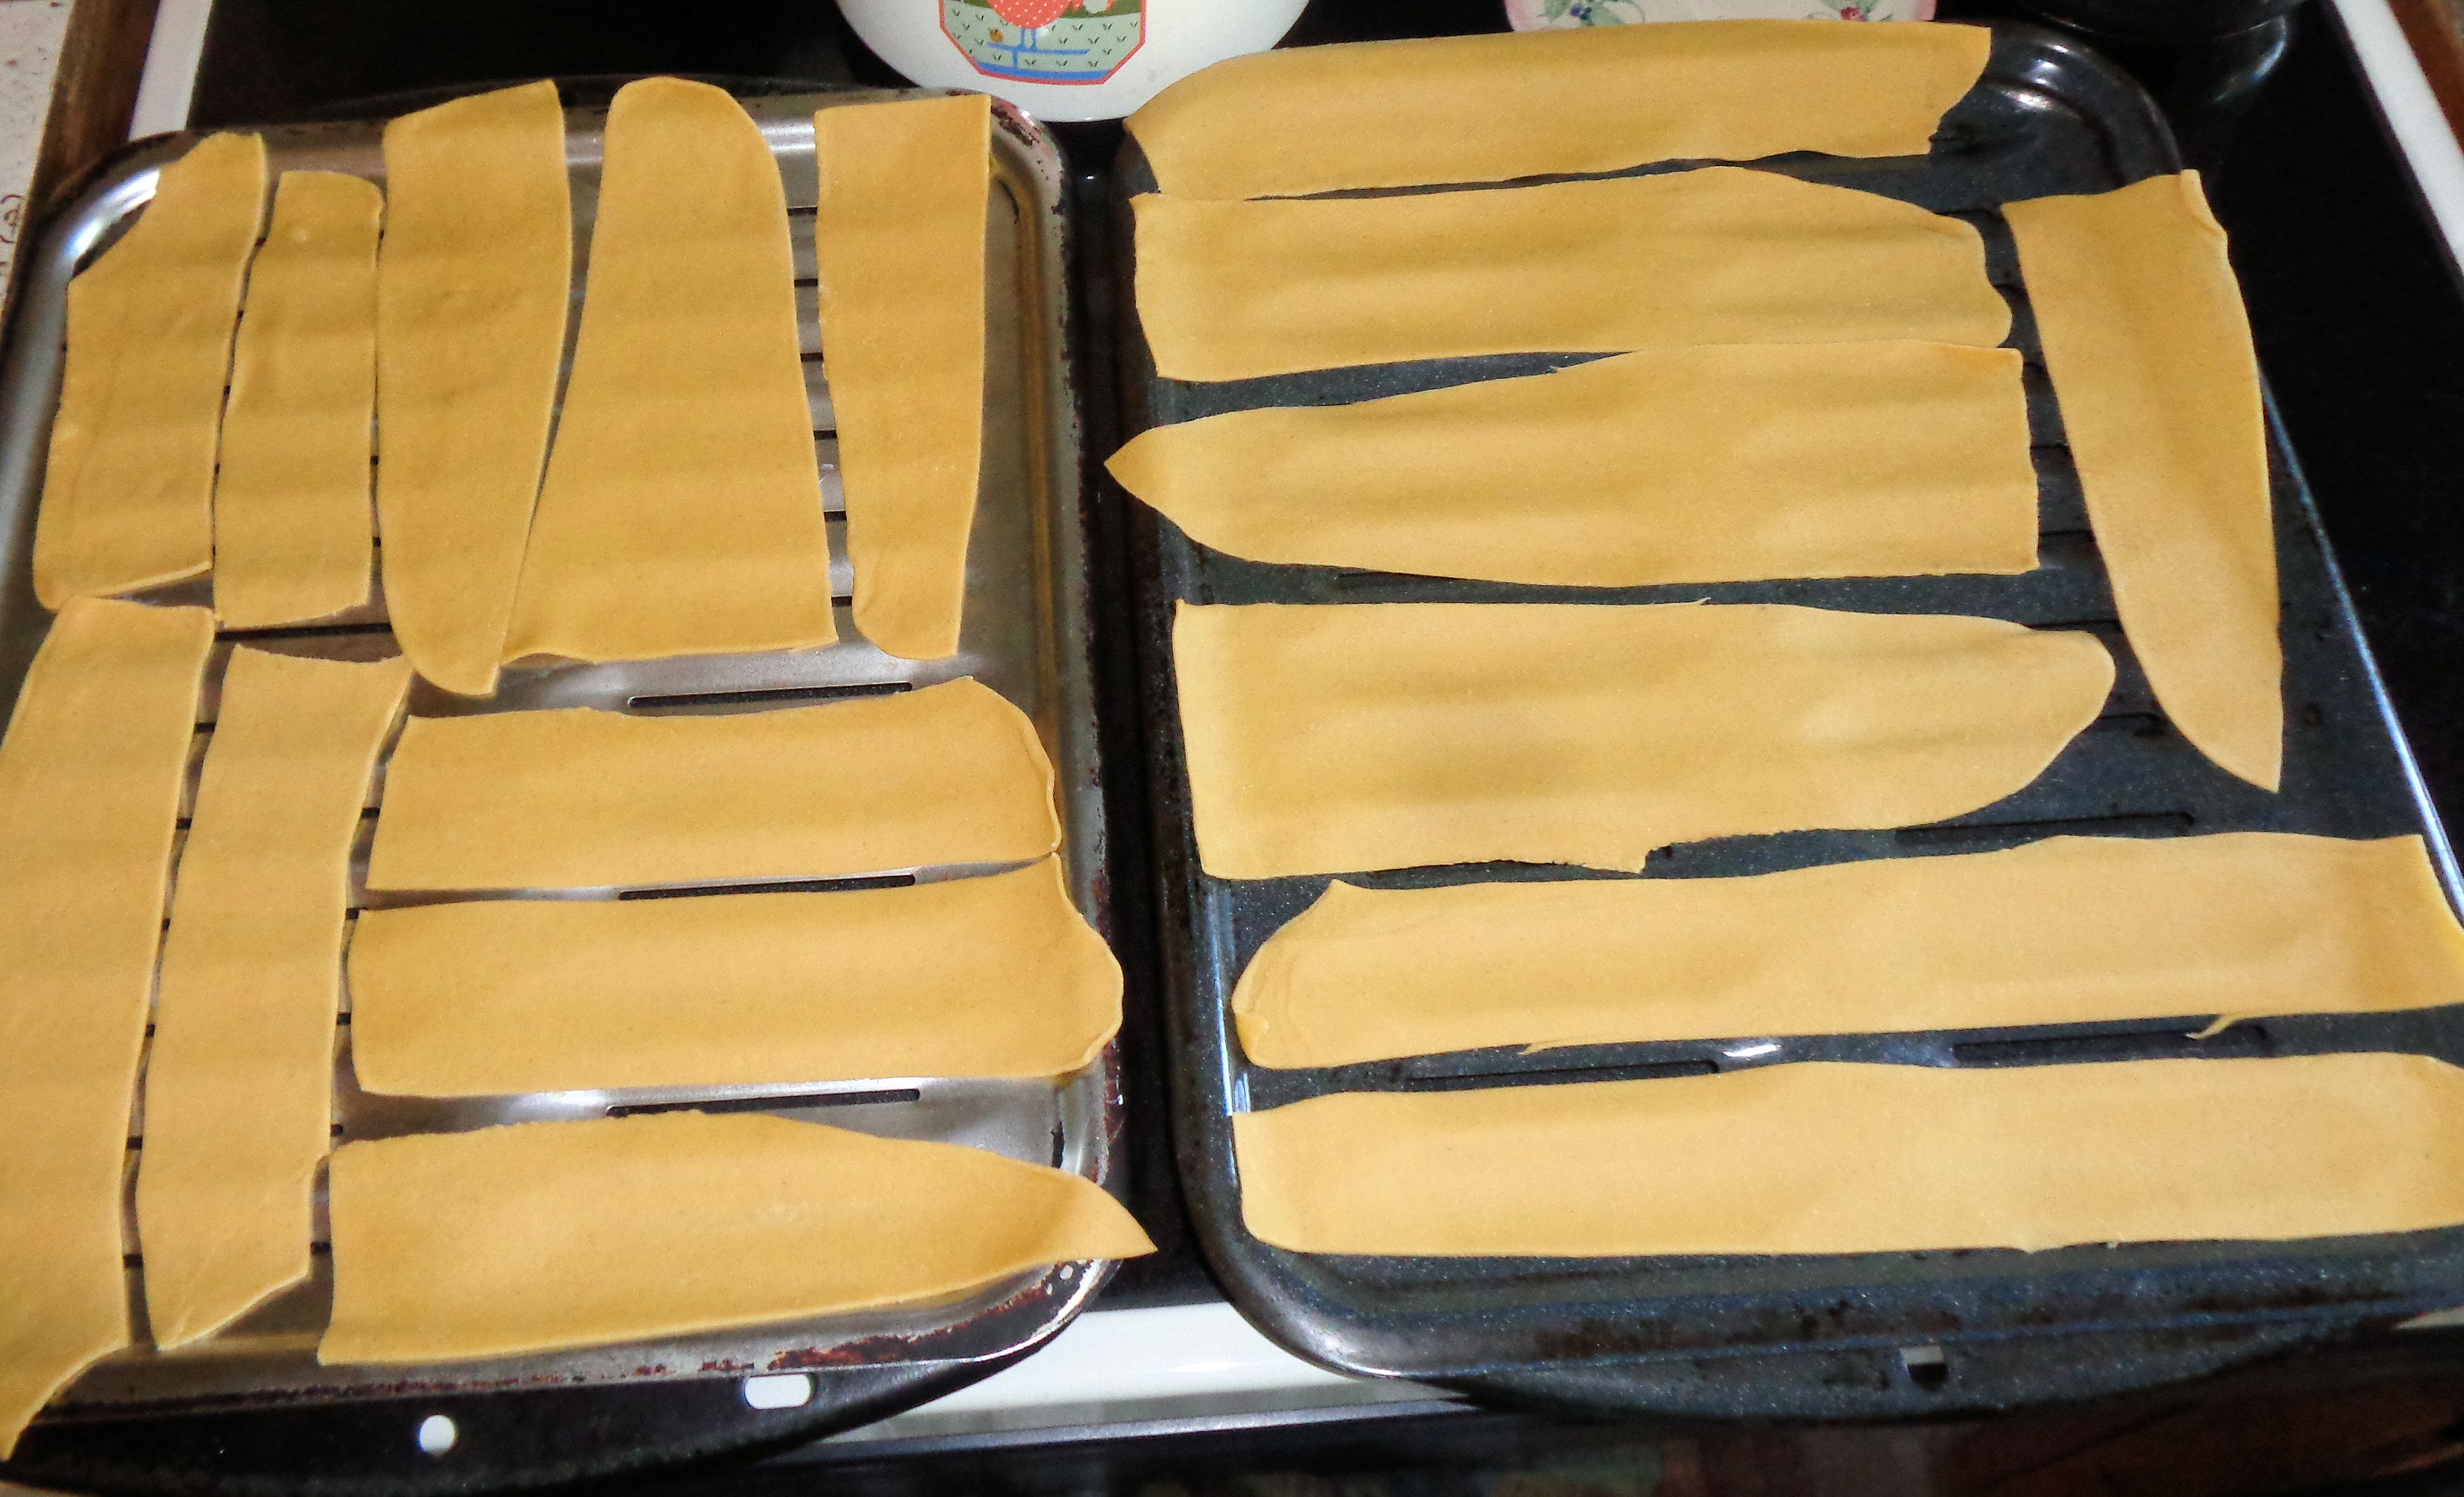
At this time dumplings can be cooked in the pot or the stew is ready to serve with fresh buttered bread or rolls.  To make dumplings, mix 2.5 cups all purpose flour, 1/2 cup white whole wheat flour, 4.5 teaspoons baking powder, 1 teaspoon salt and 1 3/4 cups milk in a bowl until a soft dough forms.  Drop the dough into the stew broth by tablespoons full.  Cover and gently simmer for 12 minutes.  There will be no tough chicken in this stew.
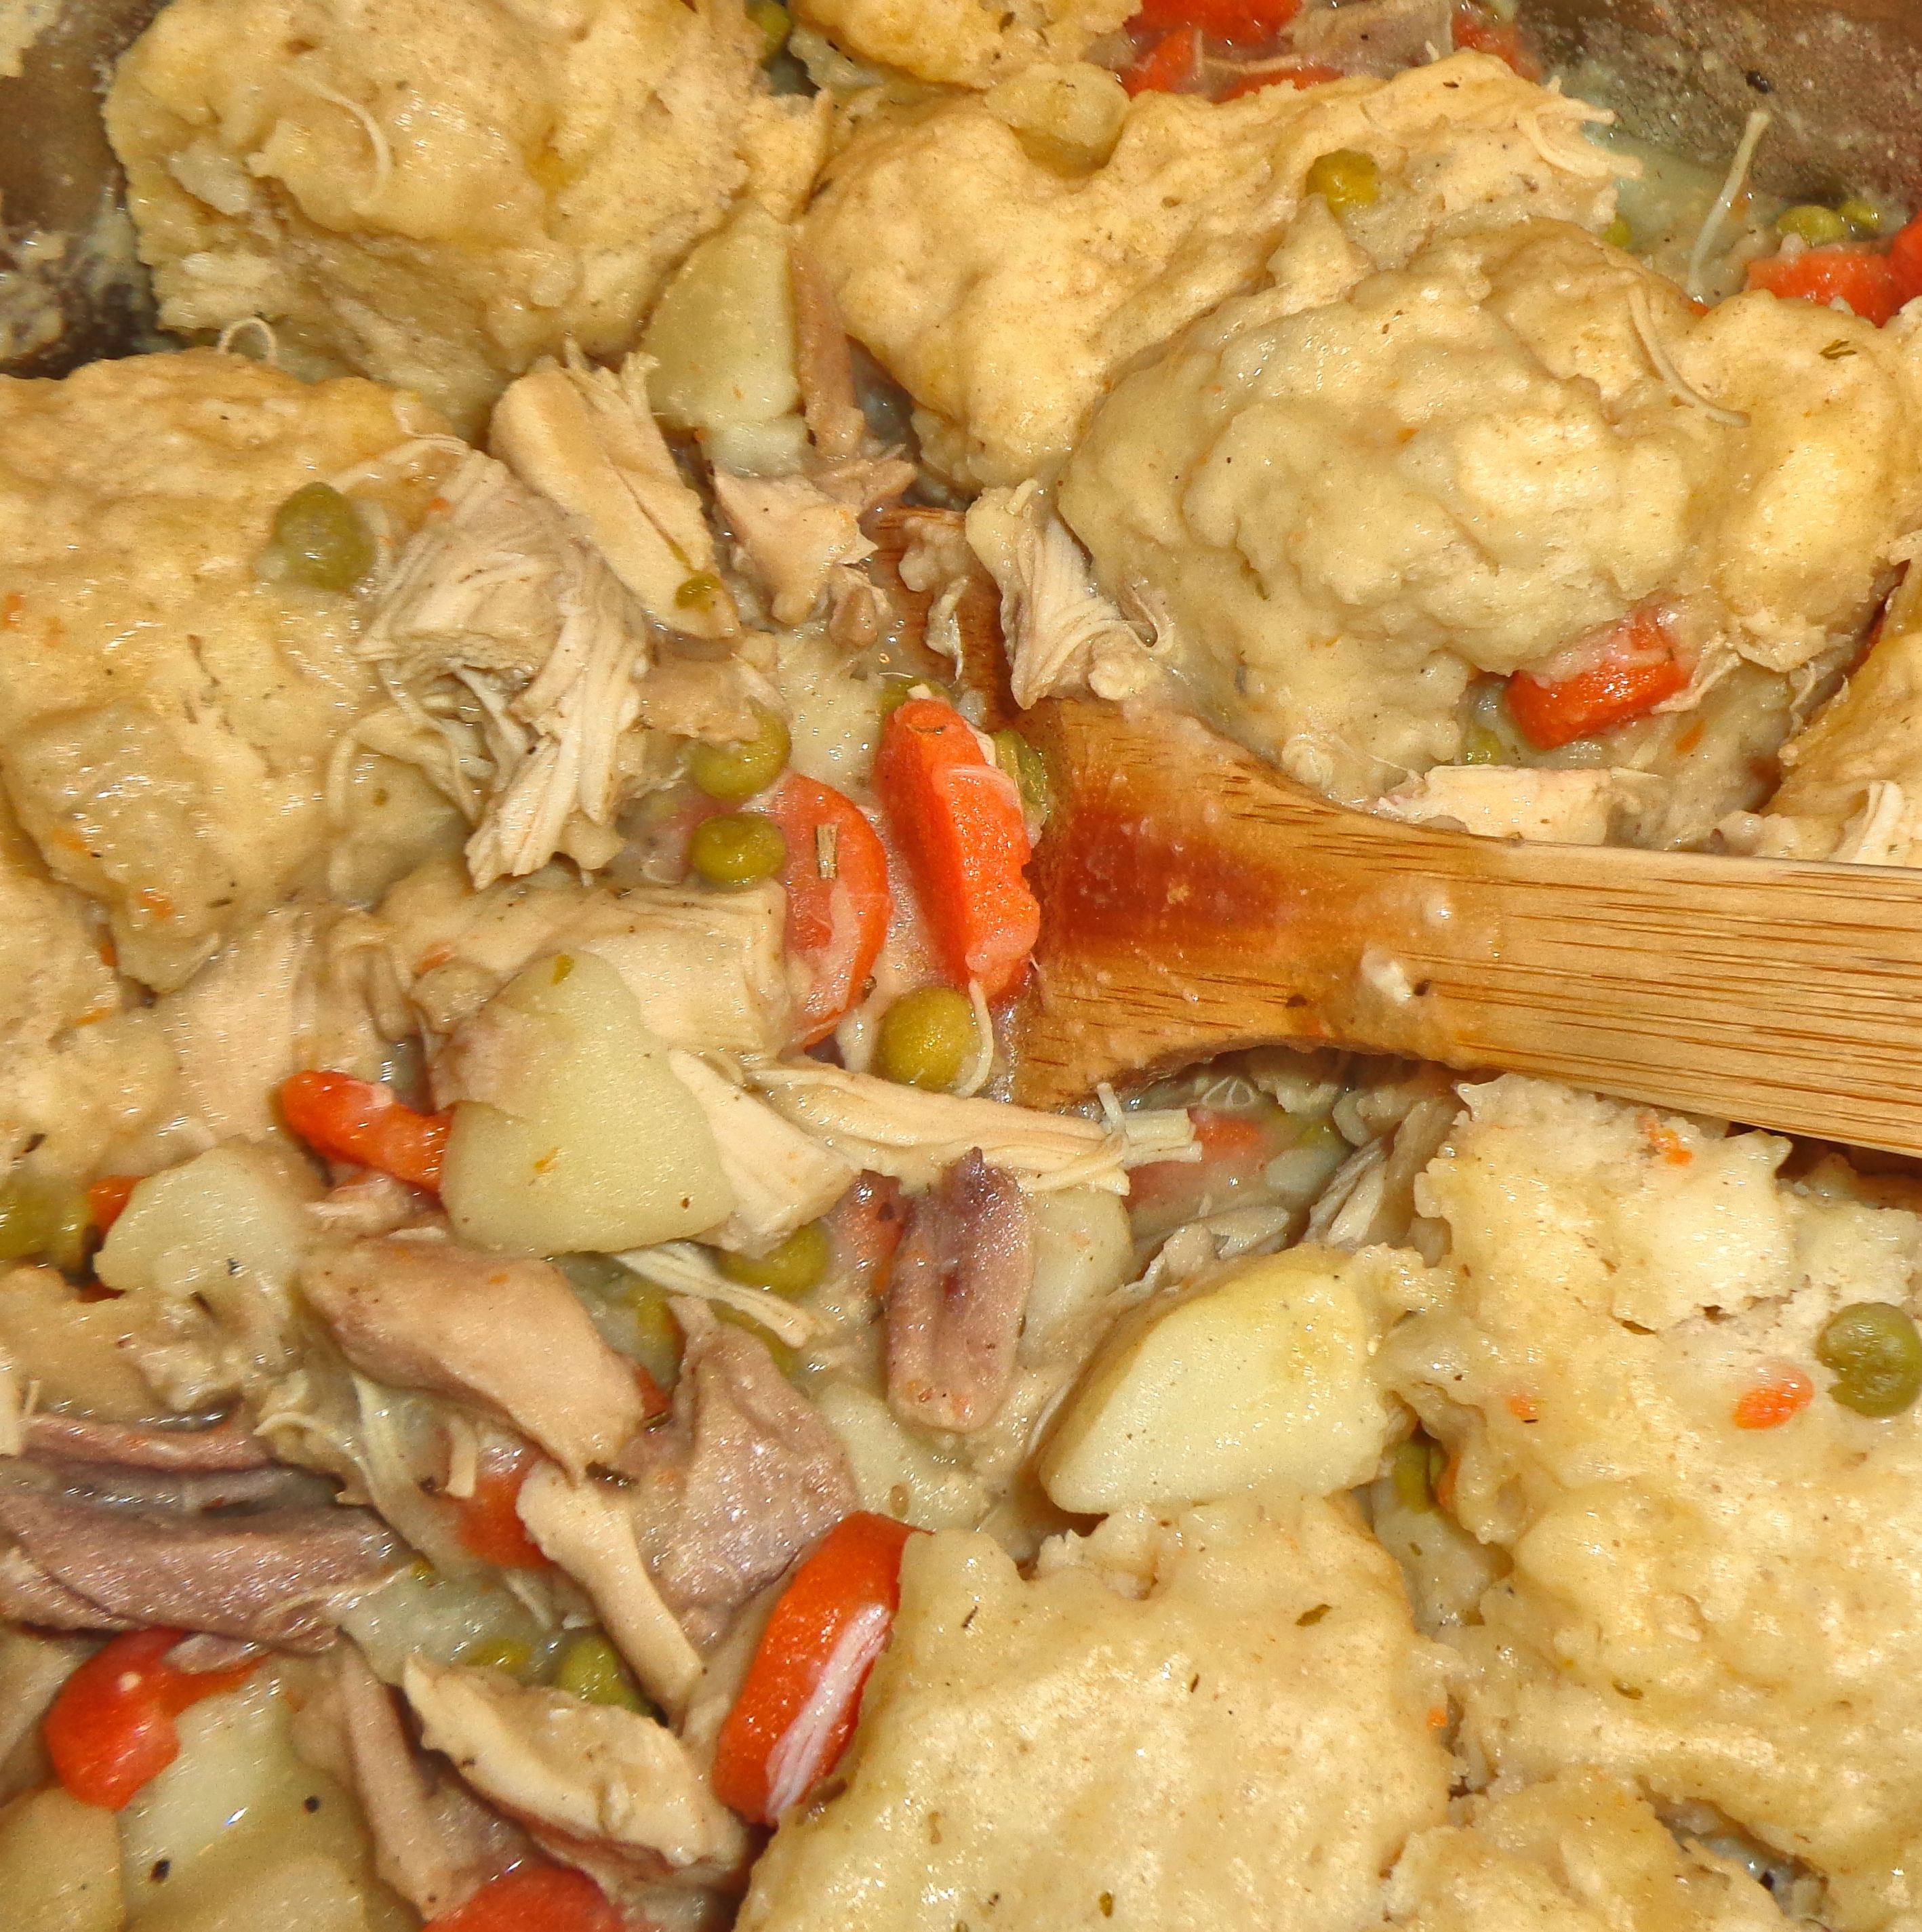
Lasagna with White Whole Wheat Homemade Pasta

When I get a hankering for lasagna I can’t just go out and buy some pasta to make it.  All the lasagna commercially available is either regular or whole wheat made with dark grained wheat.  I like white whole wheat pasta.  You get the benefit of the fiber from bran without the heavy, dark, oily texture of dark wheat bran.  I can find no companies who make white whole wheat lasagna noodles, so I make my own.

Making pasta is not hard, you just need the proper equipment:  a pasta making machine.  This little item rolls the pasta dough out into thin sheets to be cut into the required size.  You can make lasagna, fettuccine or spaghetti this way.  Lasagna noodles can be cut by hand.  The other shapes are done with cutters that are included with the machine.

The dough is very simple, just flour, eggs and water.  Flavorings and colors can be added with spinach, beet juice, carrots, etc.  Once kneaded to the optimal consistency, the dough is rolled through the machine at increasingly narrow settings until the right thickness is achieved.

Fresh dough pasta should be dried before it is cooked.  It doesn’t need to be dehydrated like the stuff sold in boxes, but there should be a well-thickened skin.  Several hours of drying time are sufficient.  A soft interior is fine.  When cooking fresh pasta it is important to use a large pot with lots of boiling water to allow plenty of space for movement.  Fresh pasta floats when it’s ready and it cooks very quickly.  It will puff up some as it cooks, about half-again the size.

This lasagna is adapted from my dear Aunt Iverna Griffin’s recipe.  She called it Griffin’s Lasagna.  Her secret flavoring ingredient was bacon.  Aunt Iverna knew that bacon made everything taste better four decades before it became all the rage.

White Whole Wheat Lasagna

1 lb pasta, cooked

To make fresh pasta:

1/2 cup white whole wheat flour

1.5 cups all purpose flour

2 large eggs

1/4 cup water

Mix flours, lightly beat eggs. Make a well in the middle of the flour, pour in the egg.  Use a fork to work the flour from the edges into the eggs until it is all incorporated.  The dough will be thick, add water while kneading, usually 1/4 cup is plenty, to make an elastic, smooth, somewhat firm dough.  Run through a pasta machine until the right thickness, cut to size and dry for several hours, turning as needed to dry both sides.

Bring 8 qts water to boil in a large pot.  Drop the dried pasta in and cook until it floats and is al dente nearly done, about 5-8 minutes.  The noodles should be just slightly under done so that they will finish cooking in the oven.

To make the dish:

Preheat oven to 350F

Use 9″ x 13″ baking pan

32 oz pasta sauce

1 lb cooked hamburger

1/2 cup grated parmesan cheese

1/4 lb sharp cheddar cheese in thin slices

2-3 cups shredded mozzarella cheese

1 lb small curd cottage cheese

1 cup sliced black olives

7-8 slices pre-cooked bacon

Combine 3/4 cup pasta sauce with the cooked hamburger.  Mix in 1/2 cup pasta sauce to the cottage cheese.  Spread 1/2 cup of pasta sauce on the bottom of the greased pan.  Place a singe layer of pasta over the sauce.  Spread with 1/2 cup pasta sauce and half the cottage cheese mix.  Sprinkle with half the parmesan, some mozzarella, and some black olives.  Place another single layer of pasta, cover with 1/2 cup sauce, half the hamburger mix, half the cheddar slices, mozzarella, and some black olives. Continue with the layers, ending with the hamburger layer.  Seal the top using any sauce left and sprinkle with mozzarella.  Place the bacon strips across the top.  Bake for one hour.  The choices of substitute and additional fillings are endless.  Ricotta cheese instead of cottage, mushrooms are nice as are sliced sweet peppers, pepperoni, sausage bits, or anything else that’s good on pizza.


Pineapple Meringue Pie

This old fashioned pie is delicious and easy to make.  Pineapple brings a sweet tropical decadence to a pie that is made much like lemon meringue.  It’s also a great way to use up extra eggs.  You will need to separate three eggs.  I like to use a commercial shortbread pie crust, but graham cracker or home made crust work fine.  I believe the recipe came from the back of a can of pineapple.

Pineapple Meringue Pie

20 oz can crushed pineapple

1/2 cup sugar

1/2 teaspoon salt

3 tablespoons cornstarch

3 egg yolks

2 tablespoons butter or margarine

1 tablespoon lemon juice

9″ baked pie shell

Pre-heat oven to 400F.  Heat pineapple in a sauce pan on medium heat.  Mix together sugar, salt and cornstarch in a small bowl and add all at once to the hot pineapple.  Cook stirring until thick and clear.  Beat the egg yolks.  Stir a small amount of the hot pineapple mix into the yolks then add all back into the pineapple.  Cook, stirring well for one minute.  Remove from heat and stir in butter and lemon juice.  Pour into the pie shell.

Meringue

3 egg whites

pinch of salt

6 tablespoons sugar

Place egg whites in a medium mixing bowl.  Add salt and beat until soft peaks form.  Add sugar one spoon at a time, beating, until all the sugar is combined and the whites are stiff.  Spread the meringue over the pineapple, assuring the topping touches the edges of the piecrust to keep the meringue from shrinking away from the sides.  Bake at 400F for 8 minutes until the meringue is browned.  Store in refrigerator.


Red Spanish Rice

Deep winter at the farm with bone-chilling winds from the Arctic, snow, ice and freezing rain, is a time for hibernation and also for cutting next year’s firewood.  A hearty, belly warming lunch is welcomed after a couple hours toiling in the cold.  One of my favorites is Spanish Rice.  My organic, vegetarian version is filling and satisfying.  All the following ingredients are available in organic versions that I found at my local supermarket.  For one-pan preparation I use my large 10.5″ frying pan with 3″ high sides.  I cook the rice and chill it before adding to the recipe.

Spanish Rice

4 cups cooked brown basmati rice

1 large sweet green pepper

1 medium vidalia onion

15 oz can fire roasted diced tomatoes

15 oz can black beans

6 oz can tomato paste

6 oz water

celery salt, black pepper, oregano and basil to taste

Chop the pepper and onion into 1/4″-1/2″ pieces.  Place in a large frying pan with some vegetable spray or olive oil and saute on medium, stirring, until tender.  Add the diced tomatoes and beans with their liquid.  Stir in the tomato paste, filling the empty paste can with water and adding that 6 oz of water to the pan. Stir in the spices.  Simmer until hot.  Stir in the cooked rice, mix well.  Turn the heat to low, cover the pan and stir occasionally until heated through.  Serve warm.  Makes 6-7 cups.


Apple Cake

Apple time is in full swing here at Phoenix Farm.  This is a very good apple year.  Many of the trees are loaded.  We picked some Cortland and King Luscious for baking.  These also are excellent fresh eating varieties.

In the photo above the Cortland are the smaller apples, there is one right in the center.  The larger ones are King Luscious.  The big Luscious on the right still has much of its natural waxy coating.  Our apples are organic, so they may not look as perfect as sprayed fruit.

Cortland is a popular apple, firm and sweet and good both for cooking or fresh.  King Luscious is less well known.  It is a giant of the apple world.  The fruit can grow to 10-12 ounces with one apple filling the hand.  A tree loaded with these huge apples is an amazing site.Luscious has a firm flesh with a crisp bite and a tart-sweet flavor.  It is a good keeping apple and performs well in pies and for apple sauce.  I often make fresh, warm apple sauce with these apples and a couple sweeter Cortland or Yellow Delicious to serve with roast pork.  This particular King Luscious apple below is big, weighing in at 8 oz and measuring 11″ in circumference. But it is somewhat flattened. The more rounded fruit can reach record size.

Nearly forty years ago I found this recipe for a moist, sweet apple treat in a horse magazine.  When apple season rolls around I like to bake it for eating warm from the oven or served cold as a quick breakfast.  It is somewhat like an apple version of a brownie, perhaps an apple blondie?  The cake is nice plain, frosted with drizzle icing, spread with butter when it is right out of the oven, served with honey or a complimentary jam or jelly.  It only required three of the five apples above to make this recipe!

Apple Cake

Pre-heat oven to 350F

About 1.5 lbs baking apples, to make 4 cups prepared apples

1 3/4 cups granulated sugar

1/2 cup oil

2 large eggs

2 teaspoons vanilla

1.5 cups all purpose flour

1/2 cup white whole wheat flour

2 teaspoons baking soda

1 teaspoon salt

2 teaspoons cinnamon

1/2 cup chopped nuts (optional)

Peel and core apples, chop to approx. 1/2″ cubes to make 4 cups.  Place in bowl and cover with the sugar, set aside.  In large mixing bowl, combine all but the nuts.  Stir to combine but do not overwork.  The batter will be firm.  Fold in the apples and sugar, and nuts if desired.  Spread in a greased 10″ x 13″ pan and bake for 45-50 mins until toothpick tests done.  Serve warm or chilled.


Buttermilk Whole Wheat Waffles

For the comfort food factor, little can beat warm waffles fresh off the iron.  The soft pockets of the waffles soak up syrup and melted butter.  Each bite has a crispy outer crunch with a soft, juicy center.  So yummy on a cold winter morning.  I use whole wheat flour so I can pretend waffles are good for me.

While waffles can be served with dozens of delicious topping, I like mine with fresh Maine butter and steeped in maple syrup from our farm.  No additional sides of bacon, ham or scrambled eggs are necessary (although all will add to a hearty breakfast,) just give me lots of waffles!  They taste the very best when served on my collection of Syracuse Dogwood restaurant ware dishes.

This recipe is one I’ve adapted and it works well.  I use the very vintage GE waffle maker my mother-in-law gave me.  It’s still going strong.  Have the waffle irons pre-heated to medium.  Too warm and they burn, too cool and they stick.  Don’t lubricate the irons with anything unless the manufacturer recommends it.  When they are done, the waffles will lift easily away from the hot irons.

Buttermilk Whole Wheat Waffles

1 1/2 cups all purpose flour

1/2 cup white whole wheat flour

2 teaspoons baking powder

1 tablespoon sugar

1/2 teaspoon salt

2 eggs

1 1/2 cups buttermilk or lowfat (1.5%- 2%) milk plus 1 tablespoon lemon juice

1/4 cup oil

If you do not have buttermilk, make your own by heating the milk to 70F then stir in the lemon juice.  Set aside for 5 minutes to allow the milk to clabber.  Meanwhile sift together the dry ingredients in a large bowl.  Whisk eggs in a separate bowl until very foamy.  Use a large whisk to stir the moist ingredients into the dry.  Do not over beat.  Pour batter onto hot irons, cook until golden brown.

For even fluffier waffles, separate the eggs, adding the yolks in with the other wet ingredients.  Beat the whites until fluffy and gently fold into the batter as the last ingredient.

Cooked waffles refrigerate for a coupe days or freeze well and are great reheated in the toaster.  Why pay for store-bought weird ingredient waffles when it is so easy to make your own?


Red Pear Jelly

The red pears are ready during the first part of September.  These early organic pears are delicious, fragrant and sweet, but they don’t hold long.  They must be picked when they are still a little crunchy and ripened under close monitoring.  In a couple days they can go from perfect ripeness to all brown on the inside.  The ones that survive my appetite for fresh pears are turned into jelly.

My pear jelly recipe was developed through trial and error and adapted from the apple jelly Sure-Jell recipe.  Pears have a similar pectin content to apples, but they contain more juice and are sweeter.  To make perfect pear jelly, select ripe fruit that is still slightly firm, not gone too mushy.  The skin and cores contain pectin, so they are retained.  The low sugar version of Sure-Jell reduces calories and allows more of the fresh fruit flavor to come out in the finished jelly.

Pear Jelly

4 lbs pears to make 4 cups pear juice

1 cup water

3.5 cups sugar

1 package low-sugar Sure-Jell

Wash pears well, remove stem and blossom end.  Cut the fruit, with the skins and cores, into approx. 1″ cubes.  Place in a large saucepan with the water.  Simmer, covered for 20-30 minutes, until soft.  Mash the fruit, place in a jelly bag or within several layers of cheesecloth and drain off all the juice.  I like to put the juice in a covered pitcher in the fridge overnight so any pulp that makes it through the cloth will settle to the bottom.  Then I pour off the clear juice, leaving the sediment.  You should have 4 cups of juice.  Add up to 1/4 cup water if you are a little short.

Place the juice in a large stock pot that is at least four times the volume of juice to allow for expansion during cooking.  Mix the Sure-Jell with 1/2 cup sugar then add to the juice.  Cook on high, stirring, until the mixture boils.  Add the rest of the sugar all at once.  Continue to stir and return the mixture to a full rolling boil that can not be stirred down.  Boil for one minute.  Remove from heat.  Skim off any foam.  Immediately pack in hot containers.  Process in a hot water bath for 5 minutes.  Cool out of drafts.  Check for a seal before storing.  Makes about 6.5 cups of jelly.  Yum!

Fancy Blueberry Cheesecake

When you really want to spoil someone, here is a recipe sure to please.  This cheesecake is light and fluffy, the no-bake variety.  It tastes sinfully rich, and it can be if made with full fat cream cheese, butter and whipped cream.  I substitute American neufchatel cheese (found with the cream cheese) or low-fat cream cheese and low-fat whipped topping to cut the calories, but save the flavor.  This is made with blueberries picked from our berry patch.  I think any berry or even cherries could be substituted for the topping and it would be successful with a bit of tinkering to get the sweetening and thickening just right.  I adapted this from an old Dream Whip recipe.

It is made in three steps.  The results of each step must be cooled prior to using and the entire cake should be chilled at least four hours before serving.  You will need a deep dish pie pan to contain all the deliciousness.

Fancy Blueberry Cheesecake

Preheat oven to 350F

Step 1 Crust

3/4 cup all purpose flour

1/3 cup butter

1/4 cup sugar

1/8 teaspoon salt

1 egg slightly beaten

In medium bowl cut butter into flour until well mixed.  Stir in other ingredients, mix well.  Spread evenly in the bottom of an oiled deep dish pie pan.  Bake at 350F for 15-20 minutes until golden brown around the edges.  Cool.

Step 2 Filling

16 oz cream cheese at room temperature

2 tablespoons lemon juice

2 tablespoons cornstarch

1 cup powdered sugar

1 teaspoon vanilla

1 cup whipped cream

Soften cheese at room temperature in large bowl and cream until smooth.  Sift dry ingredients and add to cheese with vanilla and lemon juice.  Mix this well until very smooth.  Gently fold in whipped cream to create a light texture.  Spoon over the cooled crust in the pan, spreading evenly.  Refrigerate.

Step 3 Topping

1 quart fresh or frozen blueberries

1/3 cup water

1/2 cup sugar

5 tablespoons cornstarch

1 tablespoon lemon juice

Save back one cup whole berries.  If using frozen, save them in the freezer, no not thaw.  In medium sauce pan combine the rest of the berries with water.  Cook over medium heat until boiling, then reduce heat and simmer for five minutes.  Combine sugar and corn starch in small bowl, mixing well.  Add all at once to the berry mixture.  Boil, stirring, until thick and clear.  Remove from heat, cool for 15 minutes.  Stir in lemon juice and reserved whole berries.  Cool in fridge.

When the topping has cooled to lukewarm, spread evenly over the cream cheese layer.  Refrigerate at least four hours prior to serving.  Store refrigerated.  Serve topped with a generous dollop of whipped cream.  Yum!


Oxtail Soup

When we buy half or one-quarter of a grass-fed beef animal, the butcher shop always asks if I want any of the extras.  They mean do I want liver, heart, tongue, oxtail, soup bones or suet.  I always ask for 15 pounds of suet to feed the hungry winter birds.  Otherwise, no to the extras.  Yet, every time I collect my blast frozen beef, there is a free bag full of extras.  I must have 15 pounds of liver in the freezer, and only the dogs eat it.  Plus there is a heart, that I will have to thaw out and saw through (heart is a tough muscle) to feed to the dogs.  This last beef order came with a lovely package of oxtail, oh joy.

I thawed out the oxtail to feed to the dogs, then decided to make soup with it since it was a nice, meaty cut.  Tail meat can be stringy, it is long, well-used muscle.  It needs extended, moist cooking to be edible and makes very hearty soup.  Some cooks roast the tail before making it into soup, but that’s not really necessary.  It will be tasty and tender with this recipe.  People will not even realize the beef they are eating is from the tail, unless you tell them!

Oxtail Soup

3-4 lbs meaty oxtail, thawed or fresh, cut in half or thirds to fit a 6 qt stock pot

3 quarts water

1 quart chopped tomatoes with the juice

1 tablespoon powdered onion

1 bay leaf

1 teaspoon each celery salt, black pepper, oregano, marjoram, basil

Place all in the stock pot, bring to a boil, cover and reduce heat, simmer for 1.5 hours.  The meat should be starting to fall from the bone.  Remove the oxtail from the pot and set aside to cool.  While the meat cools until it can be handled, add to the pot:

4 large carrots, peeled and diced

4 sticks celery, diced

1 cup chopped spinach

1 cup pearled barley or farro

Remove the meat from the bones and cut into bite sized pieces.  Return the meat to the pot.  Cover and simmer for 45 mins to 1 hour until the veggies are tender.

Makes about 3-4 quarts.

Oxtail can be a fatty cut.  If it is desired to remove the fat, cool the soup in the fridge overnight and remove the hardened fat from the top.  Serve hot seasoned to taste with salt.


Mushy Peas

The first time I tried mushy peas was in England at a Harry Ramsden restaurant in Bournemouth, something I wrote about in March 2015.  The flavor was very similar to green pea soup, except the concoction was much thicker than soup.  Mushy peas served with fish and chips, lamb or meat pie is a traditional favorite in the British Isles.  My last blog about mystery peas inspired me to try my hand at making this British staple.

There are various schools of thought surrounding the preparation of mushy peas.  Some cooks feel any peas will do and they use frozen garden peas, adding cream to thicken.  Others staunchly maintain that only marrow fat peas soaked in soda water will result in the authentic dish.  Marrow fat peas are not well known in the US.  These are merely regular garden peas that have been allowed to ripen on the plant until the pods dry.  The peas are large and starchy by that stage of maturity.

For my recipe, I tried to remain authentic by using dried whole organic peas that, when rehydrated, do taste a bit past the picking prime.  Mushy peas are not difficult to make, but they require at least two days to prepare.  Leftovers can be refrigerated for a day or two, or frozen.  They are the true inspiration for the Pease Porridge nursery rhyme.  This dish is also known as pease porridge in the UK.  Here is my recipe, adapted from various versions.

Mushy Peas

One pound dried green peas, preferably mature peas

1.5 quarts water

1 tablespoon baking soda

Place soda in a 2 qt glass container, add water and stir to dissolve.  Sort and rinse peas, add to water, assure the peas are well covered with water.  Let set overnight, or at least 12 hours, uncovered.  I let them set in the refrigerator.  Check after about 8 hours and add more water, if necessary to allow the peas enough fluid to properly rehydrate.  Some cooks recommend adding the water hot, I don’t find that necessary.

After the peas have absorbed enough water to be soft, drain, rinse and place in 3-4 qt cooking pot.  Add enough water to cover the peas.  Bring to a boil then reduce the heat to low and simmer for approx. 30 minutes, periodically stirring gently to prevent sticking to the bottom.  The idea is to soften the peas, but still maintain at least some of the seed shape.  The peas should be partially turned to paste with plenty of whole pea lumps.  Toward the end of the cooking time, monitor closely to prevent burning.  During the simmering, add a small amount of water from time to time, if the porridge seems too thick.

Remove from heat and season to taste with salt and pepper.  Some also add a little sugar and/or fresh mint.  Make various additions as desired, including onion, chive, garlic, etc.  This dish is versatile.  Serve the mushy peas hot.  They can be enjoyed as a vegetable or as a starch serving.  Makes about 6 cups.

Just a quick personal note:  I’ve found it necessary to use Beano when eating a good serving of mushy peas.  Otherwise, my body has a rather unfortunate reaction to large quantities of legume.