Archive | October 2014

Dogs and Horses Playing

a1

Horses and dogs like to play together.  My animals have always done so, all the dogs and horses I’ve owned, throughout the years.  The current horses:  Vista and Maddie, and dogs:  Holly and Otto, are no exceptions.

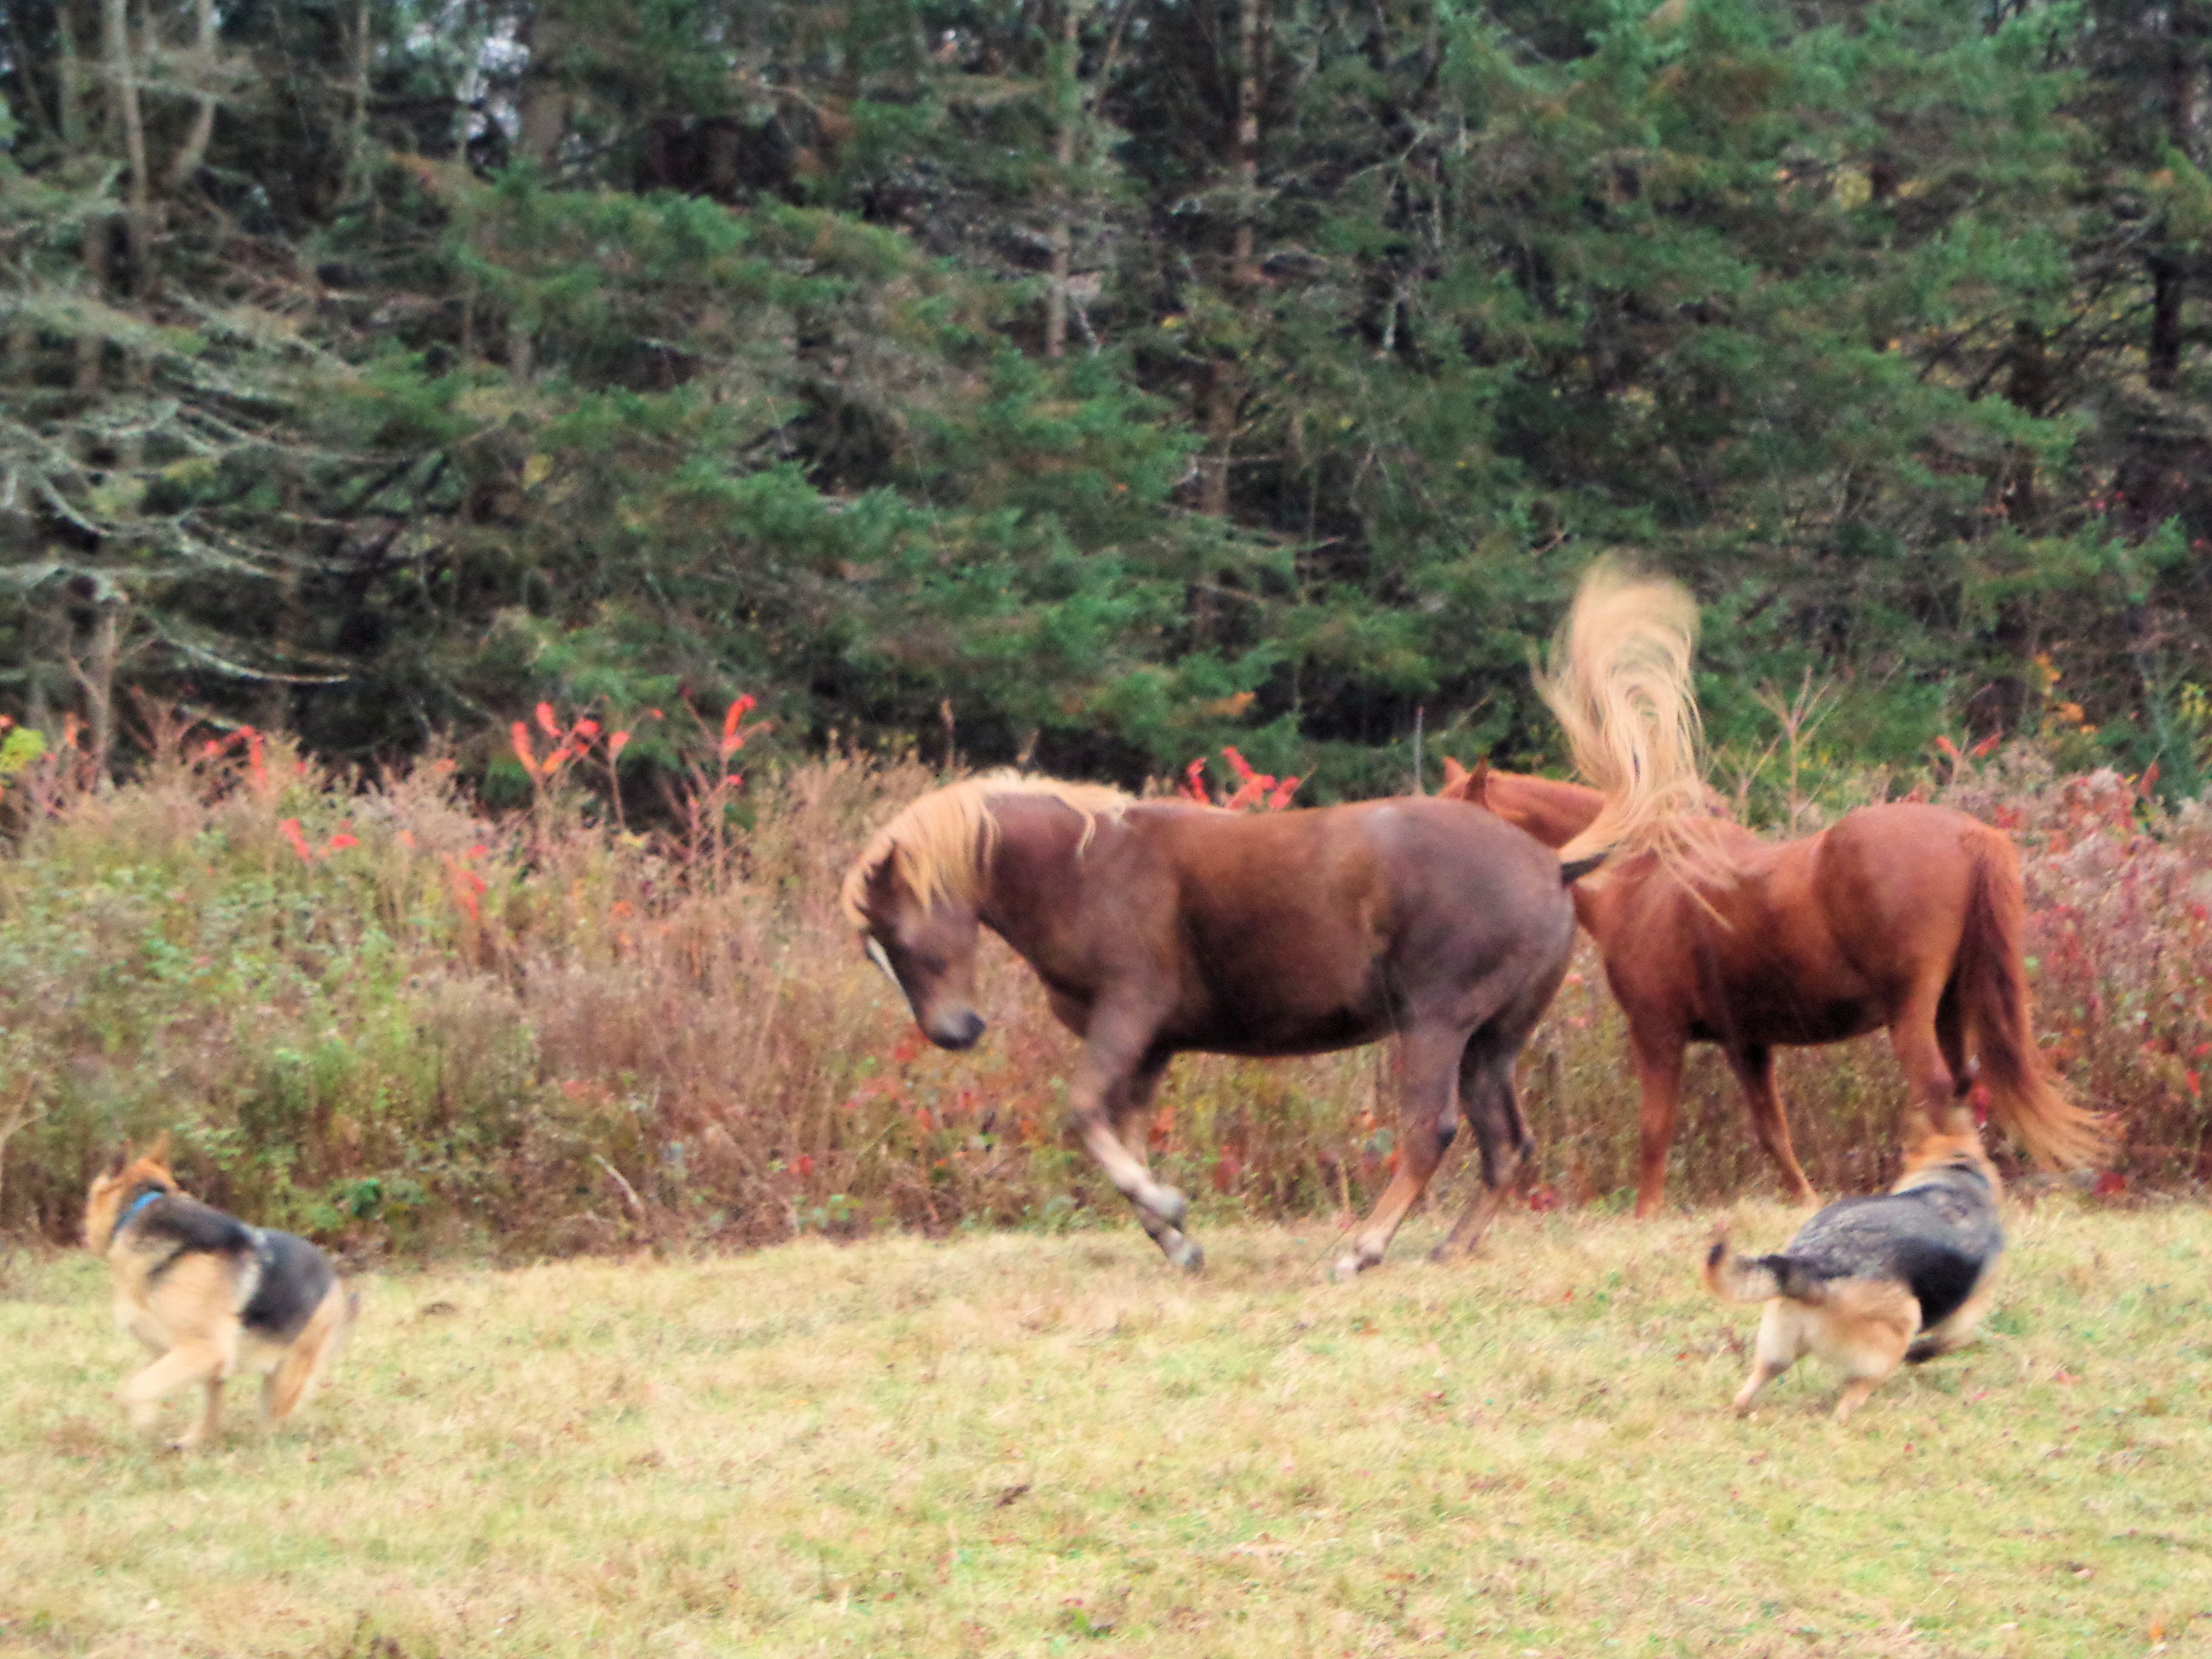
The game is chase.  Dogs pursue horses and horses go after dogs.  There is plenty of pretend kicking and snapping, but the hooves and teeth never connect.  It is a game all the animals thoroughly enjoy.  When they’re tired, they stop and rest together then are off again.

a2

Vista is getting old, she’s 25, so she does not participate like she used to.  Maddie, who is 7, is always up for a game of “Let’s Pretend to Crush the Dogs.”  She feints killing blows with her hind legs, puts her head down to rush the dogs bare-teethed, and bucks and kicks around the pasture.  a4a3
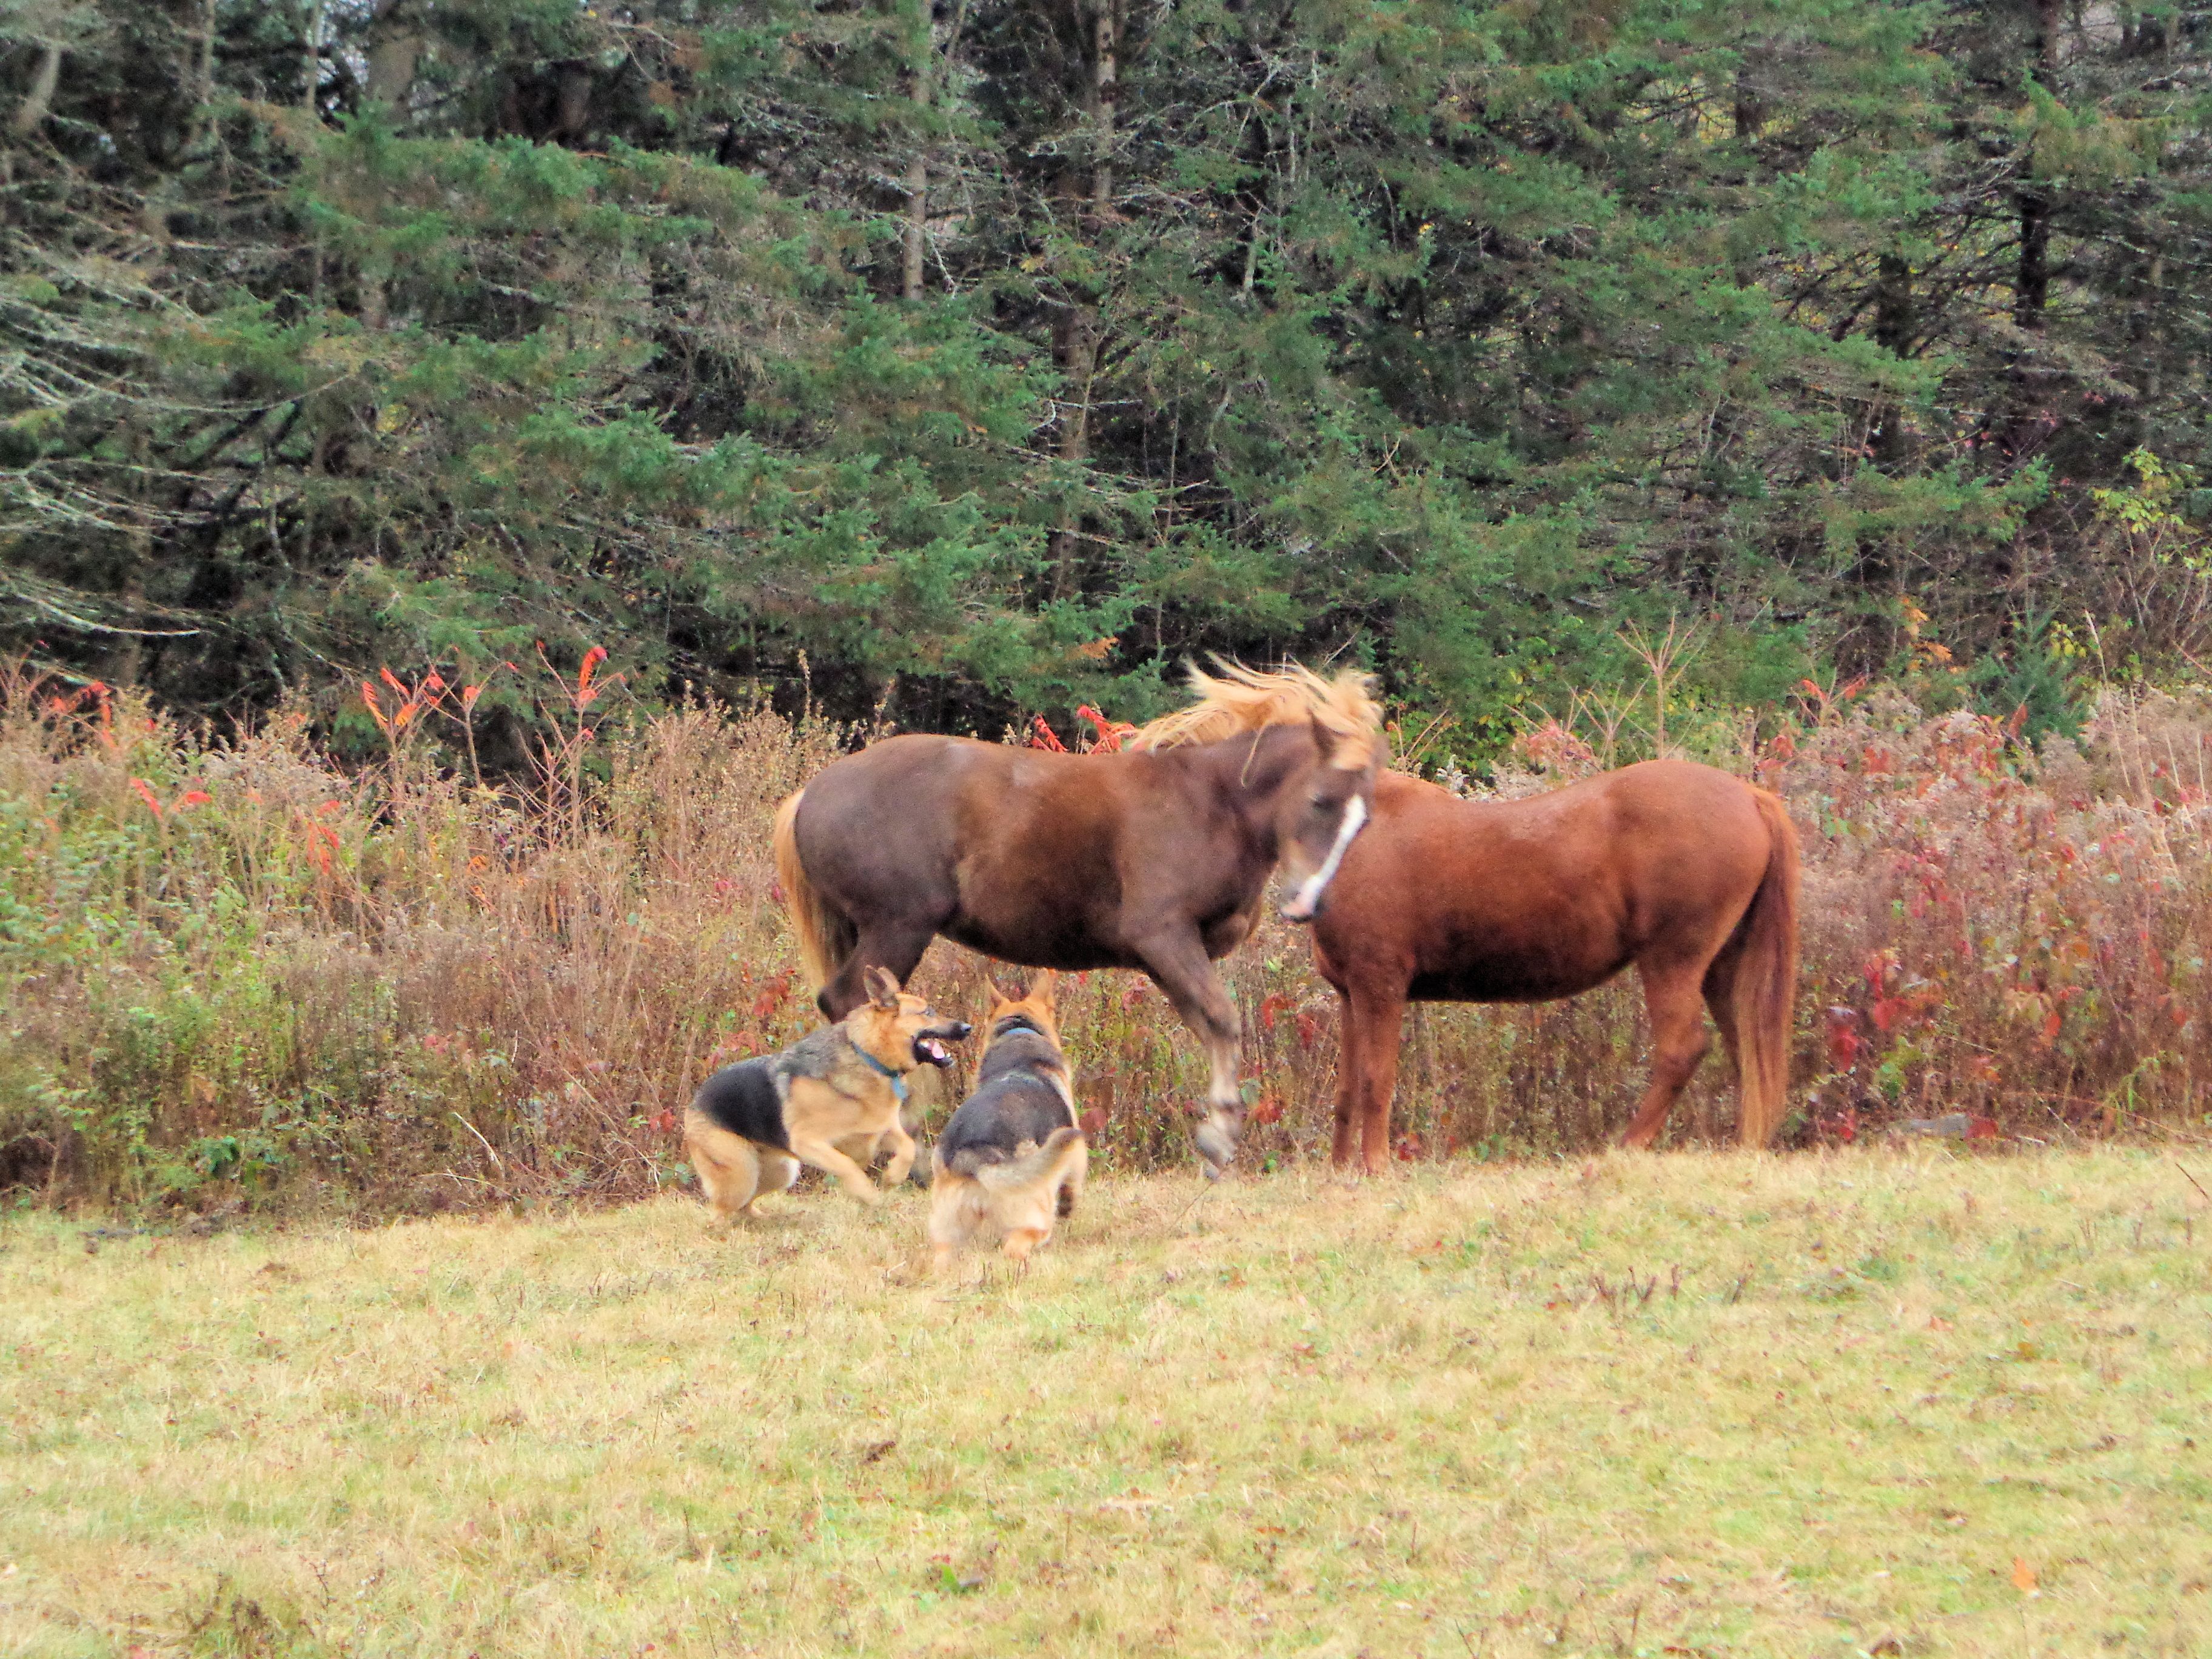
Holly is an intrepid horse gamer, showing no fear.  Otto, who is younger and more wary of Maddie, has just recently begun to join the play.  He is catching on quickly.

If I thought there was any danger, I would not allow the play to go on.  It is obvious from the opportunities Maddie has to truly injure a dog if she wanted that this is all entertainment.  The horse always starts the game with a duck of her head and a sidelong glance at Holly.  That’s the cue the dog is waiting for.  She rushes toward the horse and off they run.  There is very little barking, another indicator that this is a communal game, not involving fear or intimidation.a5

The romping is hilarious to observe, and a bit terrifying.  There is always a chance of a slip or accidental connection of hoof to dog.  Yet, as with much of the fun in life, the best play has a touch of danger.a6


Lone Maple

a1

This view was taken today across the valley of our farm.  We are in the midst of a huge nor-easter rain storm, sorry for the dreariness of the day.  Every year this one maple tree holds on to its leaves long after all its brethren have gone naked.  Most of the bare branches surrounding it are other maples.  The leaves of this tree are much slower to change color than the majority of maples.  Poplars, birch, oaks, larch, sumac and beeches still keep their leaves, many of these trees sport yellow fall foliage.  Oaks are mainly red or mahogany.  Other nut trees also retain leaves at this time, butternuts are yellow and the hazelnut is orange. But, this maple is an oddity.  It is nice to enjoy the vivid orange of autumn maples just a little longer, though, so I’m not complaining.

a2

Maddie and Vista and the lone maple

Wild Grape Jelly

g1

Wild grapes growing among the mock orange

Wild grapes are so plentiful on our farm that they are a nuisance.  Wherever the seeds land, new vines spring up.  Songbirds plant them.  While it was another dismal year for our domestic grapes, the wild grapes grew a bumper crop.  So I decided to try making wild grape jelly.g2  The bunches of fruit hold grapes about 3/8″ in diameter.  The juice is plentiful and deep purple-red.g5

I gathered all the bunches I could find, thus saving ourselves from a lot of weed grapevine removal down the road, and filled a big pan to overflowing with fruit.g3  Placing a few bunches at a time in layers of cheesecloth, I crushed them by hand to extract the juice.  The pan full of grapes yielded eight cups of juice. Because the juice held considerable crushed pulp in suspension, I let it sit in the refrigerator for a couple days to settle.g4  I poured off six cups of clear juice before hitting the sediment. Coincidentally, six cups is exactly the amount of juice needed to make a recipe of jelly!

I like to use reduced sugar pectin for jam and jelly making. Six cups of juice required 4.5 cups of sugar.  For this recipe I used all-natural Florida sugar that has a pale tan color.  The pectin is mixed with 1/2 cup of the sugar then stirred into the juice.  After the juice is heated to a full boil,the rest of the sugar is added.  The juice is returned to a full, rolling boil and stirred for one minute.  Then the jelly is skimmed to remove foam and ladled into clean, warm canning jars.  I use a ten minute hot water bath, gentling boiling the water in the canner of filled jars, to sterilize the jelly.g6

After the jelly cooled and the jars sealed, I had 8.5 cups of wild grape jelly.  I opened one to sample the wares.g7  The wild fruit has unbelievable flavor compared to domestic grapes, rich and faintly reminiscent of currants or mulberries.  The jelly is a bit piquant for my husband’s tastes (he loves sweets) so I would probably add another 1/2 to one cup of sugar to the recipe if I want him to eat it.  I think it’s delicious the way it is and very tasty on toast!

Wild Grape Jelly

About 10 lbs small wild grapes, pressed to yield 6 cups fresh juice

2 boxes Reduced Sugar powdered pectin

4.5-5.5 cups granulated sugar.

g8

Hazelnut Harvest

h1

The hazelnut or filbert bush has produced its first harvest!  This is very exciting for me since hazelnuts are my favorite nut and this is my first attempt at growing them.  The small tree is about six feet tall.  The leaves are turning lovely shades of orange, mahogany and gold and the nut clusters are changing from yellow-green to dark brown.h2  As the husks of the nuts brown, they slowly dry until the nuts inside are released to drop to the ground.h4  I am picking nuts early, before they drop.

The first nut was the most rewarding for me because I didn’t know if the tree was able to pollinate. Without pollination it forms empty nutshells.  Cracking that first nut open, I found it filled with a plump kernel of white meat.h7  Fresh hazelnuts that haven’t been given time to dry taste like raw peanuts mixed with hazelnut, yummy in their own way.

The nut husks are large, pulpy, extravagantly frilled affairs covered with a down of short hairs and slight stickiness.h3 They occur singly or as pairs on my tree.  The husks are concealed beneath the leaves, hard to spot.  At harvest time commercial growers shake the trees and sweep the nuts up with large machines.  The floor of the orchard is kept bare, free of all vegetative growth, to facilitate the sweeping.  I will have to pick my filberts by hand.  I hope not to lose too many to dropping out of the husk into the thick grass before I can get them.h5h6
The whitish part of a hazelnut shell is oriented toward the base of the husk, closest to the branch.  Since I’ve never seen a filbert tree produce, all  this information is fascinating for me.

There are two hazelnuts in my orchard.  The second one is tiny and failing to thrive.  I sure hope it survives so I can continue to get nuts.  As soon as it goes dormant I will move it a couple feet in case there is something wrong with the hole that is preventing its growth.  I guess if it dies, I can always buy another.

First Egg

ck2

Great news!  The pullets that hatched May 7 are starting to lay eggs!  I’ve been supplementing their light in the morning for about at week now, so they get 13 hours of light to encourage them to lay.  Hens need at least 12 hours of light to produce eggs.  One of the little black hens had been wandering around the barn during the day talking to herself and looking at me like I could do something to help her.  This behavior is a good indicator that egg production is imminent.

I set up some nest boxes where the young chickens roost.  In each box I placed a wooden nest egg (artificial egg) so the pullets could understand what nests are for.  I put the pullet on the nests to get a good look.  And today my efforts were rewarded with the first new egg!  I’m fairly sure the little black hen laid it.

In the photo above, the new egg (on the left) is shown with a normal size large hen egg.  Just a tiny first attempt, but her eggs will quickly increase in size.  Sometimes the first eggs may contain only albumen. The shell color is good, dark with some greenish shading.  Ameraucanas’ first eggs always have the deepest color. Over time, as the hens lay, the bluish color fades quite a lot.

The hens in the photo below are all the same age and should begin laying soon.  The pullet that laid the first egg is the black one toward the back.  She is very friendly.  I hatched her and her sister from eggs I bought from a breeder in New Jersey and had shipped in the mail.  Only three of twelve eggs hatched, giving me two hens and a gorgeous black rooster.ck1

Building a New Barn

b1

b2

Old horse shed now housing rabbits, old cow barn on the right

Here is our current barn, built about 40 years ago.  The lower area that shows light green concrete blocks used to be a cow barn.  The old barn is on its last legs.  The cow section was slowly collapsing due to shifting and crumbling of the concrete.  My rabbits were housed in this old area and needed to be moved.  Last year I tore down part of the cow section and reused some of the old beams in a new temporary shelter for my two horses.  I moved the rabbits into the old horse barn.

We can’t afford to raze the barn and build a new one all in a few months.  Because we want to put the new barn where the old one sits, the project must be taken in steps so the animals have shelter and there is a place to store the hay.  I also want to save money by doing as much of the work myself as possible and recycling as much material as I can.  The beams of the old barn are cedar timbers that are still good.  The aluminum roof panels I want to remove carefully so I can use them to cover the walls of the new barn.

b3

The chickens like to keep me company when I work

b4

Lumber for recycling into a temporary shelter


This summer and fall I finished removing the boards and beams from the cow barn right down to the concrete. There is a nice selection of recycled lumber from the old barn.

b6

Current horse shelter to be made into a rabbit barn

b7

Foundations of the new temporary horse barn and storage area

Now I have to move the rabbits again as the old horse shed is also in danger of collapse.


I am constructing another temporary barn for the horses plus a large storage area for hay and will move the rabbits to where the horses are now.
I will close in that former horse barn so the bunnies will be warm this winter.  So far I have used old 4×4 timbers from the cow barn to make sills for the walls of the new temporary horse barn and hay storage area.  I have to buy a bunch of 2x4s to frame the walls and make the roof.

Then I will tear down the shed the rabbits were in before the snow brings it down this winter.  After that I will start to remove the inside of the barn in preparation for taking the entire structure apart next summer. We will construct a new pole barn in sections, starting with the hay storage.  This project will keep me busy for a couple more years, at least.

Surprise Lady Figurine

a2

I have not blogged in a few day, mostly due to having company.  I wanted to share this lovely figurine given to me as a surprise.  A couple days ago I took one of my guests to the local antiques mall.  When my back was turned she purchased the lady in the blue gown that I admired but put back on the shelf as too extravagant for me to buy for myself.  Such a nice surprise and a very thoughtful gift!a3a1

The ceramic figurine is so finely detailed and carefully hand painted that I believe it is antique or close to it.  There is a maker’s mark I can barely read and have not been able to find in catalogs of ceramic marks.  It appears to be a shield with a crown on the top.  There is lettering above the crown that I can not read and also some capital letters beneath the shield that may be HRP, though I’m not sure.a6  I suspect the figurine is European, possibly Scandinavian, German or Austrian.  She stands 10″ tall and holds a basket of flowers.  The details of the dress are especially interesting.  For some reason she seems to be a Danish or Swedish lady to me.

a5a4There are a few small chips in the paint, mostly on the gown. She had accumulated quite a coat of dust.  A good scrub brought out the lovely colors of the flowers and the roses on her cheeks.  I will continue to search for the origin of the mark so I can identify the maker and age of the piece.  I am so lucky to have such a kind guest!